Wednesday, February 18, 2015

Nikon D810 vs Canon 5D Mark 3

 Recently I made the switch from Canon to Nikon after 9 years of shooting on Canon DSLR cameras. The decision to switch was brought on by certain limitations I was experiencing with my 2 Canon 5D Mark 3 cameras. Mainly noise was the issue, in the shadows. For most people that just shoot stills this can be annoying enough but manageable. For people that shoot timelapse it can ruin a shot or suck up hours in applying noise reduction filters just to make the shot useable. But now with 4K becoming more and more prevalent in the market place things you don't want to see in the image are going to start showing up more. I feel having a camera with this much noise and lack of flexibility in post is a problem.


 Before heading down this road I did a little investigating on the Nikon D810 to see if it was something that could be a good replacement to the Canon 5D Mark 3. After seeing some images that compared the shadow recovery and the ability to push the overall exposure of the D810 to the 5D3, I was blown away. The noise that I've seen in some of my shots when I tried to push up the shadows or exposure in the 5D3 wasn't there in the D810 test images. Also the increase in mega pixels and dynamic range was also something that interested me. But I wondered how that would translate to timelapse.

 There were some fellow shooters that I had talked to about switching over that voiced concern with going over to Nikon. Some saying that the cameras weren't good at shooting timelapse and that the final image had lots of flicker in it requiring work to remove it. I was reassured by other timelapse shooters that shot on Nikon that this wasn't a problem. One of the biggest problem most people encounter with switching from one brand of DSLR to another is they will have to switch to different lenses. Its more of a problem going from Canon to Nikon instead of the other way around because of the flange distance on the Canon lenses. Nikon mount lenses can be fitted with an adaptor to be used on Canon cameras, which makes them more versatile in the switch between these two manufactures. I already had a couple of Nikon lenses and some Zeiss ZF glass back from my RED One days. They were a much cheaper alternative to the PL lenses used on RED cameras at the time. Since these were Nikon mount lenses I was able to use them shooting timelapse on my Canon DSLRs. So long story short, it wasn't that painful for me to move from Canon to Nikon. Still I did pick up a Nikon 14-24mm 2.8 lens when I got the D810's, which is an amazing lens BTW.


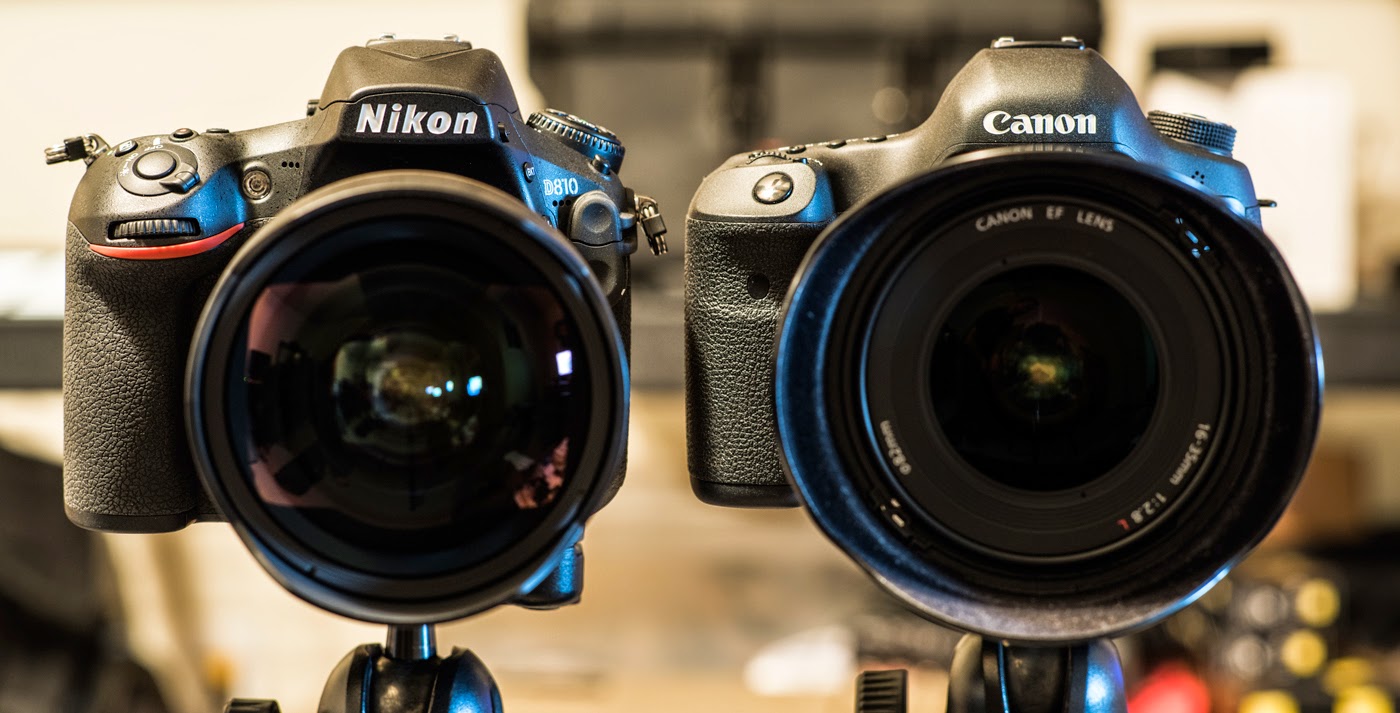
 Now trying something new comes with bit of a learning curve and switching from one brand of DSLR to another is no exception. Besides button placement and where things are hidden in the menu both the cameras are similar in form and that they capture light. Other than that they are about as different as the way you twist the lens onto the camera...CCW for Nikon, CW for Canon.

 After learning the basics of the D810 and firing off a few frames I began to realize that I was shooting with a camera that was better suited for timelapse. Now the reason I say this is because of the little things, which do add up to a lot. The shutter on the D810 sounds much better than the 5D3 for one. Its much quieter and more pleasing to hear...but that's just an opinion. The D810 has a pretty cool shutter for the eyepiece that blocks stray light from coming in there during long exposures. On the 5D3 I usually just had a piece of black gaffers tape over the eyepiece to give me the same effect. The other thing that struck me as extremely helpful was the 1:1 zoom on the LCD. Canon has something like this but their 10x zoom in the LCD to check focus is a joke not even coming to half the resolution the camera is shooting. So finding critical focus on the D810 while in live view is much easier as your able to see a 1:1 image in the LCD screen. The built in intervalometer the D810 has is pretty helpful and is nice to have if for whatever reason you don't have the external remote controller Nikon makes...or one of the knockoffs. Resolution on the D810 is greater than the 5D3...36MP vs 23MP. But of course with the announcement from Canon that they are going to be releasing a new set of cameras for the 5D line that are 50MP this might seem like Canon has the upper hand...I'll believe it when I see it. I don't mean to sound like a Canon hater. But after years of buying their products and dealing with the limitations I'm way over them.


 One of the biggest things that got me to switch was shadow recovery and pattern noise. The Nikon did not disappoint in this field. I found that I could push the shadows 100% without some god awful pattern noise creeping up. The other nice thing I discovery about the D810 is that I could push the RAW files safely 2-stops at ISO 100 without the image falling apart like the Canon RAW's do. ISO 100 is pretty safe...or at least it should be but the Canon fails if you want to recover any details in the shadows or push the exposure.


 Enough talking, here's the video.


Nikon D810 vs Canon 5D Mark III - A Timelapse Test from Andrew Walker on Vimeo.


 Hopefully you were able to see what I saw in the RAW files in this video. But if your still not seeing it because of the web compression, here are some jpegs. Now some people might be saying that they would never push the shadows up that high in their shots. But the only reason why people wouldn't be pushing the shadows that hard is because of the noise in the Canon RAW files. If that wasn't the case then I think people would be digging much deeper into the Canon's shadows.

 The shadows where pushed up +100 in Adobe Camera RAW for both these shots.


The shadows where pushed up +99 in Adobe Camera RAW for both these shots.


 I would like to say that this horrible noise hidden in the 5D3 files will be limited to the older model Canon DSLR cameras. It sounds like the new 5DR and 5DSR are going to use the same sensor technology as the 7D2 with rumors its going to have the same noise level as the 5D3. If that's true then all these problems that I have shown in this post would carry over to these new cameras. Hopefully Canon gets their act together and fixes the way their cameras collect light and processes the images. Personally I'm not going to hold my breath for Canon to do anything...

 So after all this needless to say I have begun thinning out my collection of Canon gear.


Tuesday, January 22, 2013

14mm Tests (Canon, Rokinon, Zeiss and some Nikon)

 Over the last week I had the chance to test out some of the different choices in 14mm lenses out there. The first night of testing was out in downtown LA shooting some long exposure stills of the city and the freeway. The second day of testing was done over at Duclos Lenses, thanks to Matt Duclos for letting me use his awesome facility out there and for providing some of the lenses for the test. There are 2 inconsistencies in the tests that were done. The Nikon 14-24mm was only available on the first night and the Zeiss 15mm was only available on the second day of testing over at Duclos Lenses. Now I know the Zeiss isn't a 14mm lens but it was a lens I was very curious to test and that's why I put it in here. I don't think to many people are going to complain about it. On with the pictures.


 These first set of tests I just wanted to get some quick real world shots of these wide angle lenses. I was using them with settings I would normally use for shooting timelapse. But this shooting style still shows the quality and faults of the lenses.


 The first thing that I noticed just looking at the Canon, Rokinon and Nikon was the lens coating. Looking at the front elements of the 3 lenses you can see that the Canon and Nikon don't seem to pickup as much reflection and appear to be darker. The front element on the Canon and Nikon looked like a piece of glass that was curved over the other elements inside of the lens.


 The Rokinon looked as if it had a big piece of glass sitting on top of the internal elements of the lens. If you held the sideways you could see right through the front element.

 The Canon and the Nikon didn't have this and I believe it was because of the construction of the lenses and the coating on the front element.


/>


 Now some people my not know how much coating can make a difference when it comes to lens flare but its huge in this case. This comparison between the Canon 14mm 2.8L II and the Rokinon 14mm T/3.1 is pretty telling. In the setup for this test I wanted to have some of the street light in for some flare comparison. I didn't know the Rokinon was going to flare so much until I got it on there. There is also some really interesting distortion going on in the Rokinon lens. Not sure why but the Rokinon seems to have a wider field of view than the Canon 14mm. (Mouse over to see the difference.)


 Here's a comparison between the Nikon 14-24mm 2.8 and the Rokinon 14mm T/3.1. Again flare control is much better in the Nikon and the lens distortion seems to be more natural. (Mouse over to see the difference.)


 The comparison between the Canon and the Nikon was pretty interesting. Since the Nikon is a zoom lens it has some image shift, which account for the difference in the 2 images. Also the Canon seems to control the flare from the street light much better than the Nikon does. (Mouse over to see the difference.)

 Now for the sharpness test of the 3 lenses.


 As you can see in the 3 100% crops from the center of the lens the Canon and Nikon are pretty much the same sharpness at f/2.8. The Rokinon is softer wide open. I'm pretty sure that lens was as sharp as it was going to get. It was also much harder to focus than the Canon and the Nikon lenses.


 For the more controlled part of the test that I wanted to do I got to go over to Duclos Lenses and do my testing there. Huge thanks for Matt Duclos for letting me come over there for the tests. Matt also supplied the Rokinon 14mm and the Zeiss 15mm. If your looking for some lenses I would strongly suggest checking out Duclos Lenses.


  The first test I wanted to check the overall look of the lenses against each other and see what kind of distortion they have. I have chosen to just show the tests of the lenses shooting wide open as that's a pretty big factor. I did shoot a couple different stops for each setup. As you would imagine the image does get sharper in all of the lenses. I do put up some different f-stops to show the difference in the flare of the lenses and in the sharpness test.


  Test between the Canon 14mm 2.8 II and the Rokinon 14mm T/3.1. Same thing from the earlier tests showed up. The Rokinon 14mm seems to have a wider field of view. But there also seems to be something going on with the distortion of the lens that might explain this. The theory I have about the Rokinon is that its using some kind of reducer to get its field of view and speed. Granted its just a theory but might explain why it has a wider field of view than both the Canon and Nikon 14mm lenses. (Mouse over to see the difference.) 


 Here's a comparison against the Canon 14mm 2.8 II and the Zeiss 15mm 2.8. Kind of hard to really AB between these lenses because there are different focal lengths. But still it gives you and idea as to the difference between 14mm and 15mm. (Mouse over to see the difference.)


 Rokinon 14mm T/3.1 vs the Zeiss 15mm 2.8. (Mouse over to see the difference.)

 The second set of tests were sharpness of the lenses.


 Canon 14mm 2.8 II 100% crop.


 Rokinon 14mm T/3.1 100% crop.


 Zeiss 15mm 2.8 100% crop.

 These next set of tests are to show the different flare characteristics the lenses have.


 Canon 14mm 2.8 II


 Rokinon 14mm T/3.1


 Ziess 15mm 2.8

 Another flare test with 2 light sources.


 Canon 14mm 2.8 II


 Rokinon 14mm T/3.1


 Ziess 15mm 2.8

 My conclusion, the Rokinon 14mm 2.8 or T3.1 is a nice lens for the money you spend. It has some issues with distortion and flare but some people might welcome the look of the lens. It seems that the Rokinon did give a "mustache" distortion to the image, as I've heard it described from some fellow shooters. The Canon and Nikon lenses were very sharp and controlled the flare much better than the Rokinon. But both of those lenses are $1,600 more than the Rokinon, so I wouldn't only hope you would be able to see that difference in those lenses and you do. The Zeiss 15mm 2.8 was also a really nice lens and very sharp. I wish I would have been able to play with it out in the field but maybe I'll get to one of these days. I have a couple Zeiss ZF lenses that I use quite regularly and they are some of the sharpest lenses I have.

 So if you have a limited budget and need a 14mm I would say get the Rokinon. But if you got the cash and want to have a overall better image to work with I would say go with the more expensive lenses.

Monday, February 13, 2012

Epic X Motion Control Timelapse (Kessler & Dynamic Perception)

 For the last month since taking delivery of my Titanium Canon mount for the Epic X I have been shooting timelapse in and around the LA area using 2 motion control systems. The Kessler Shuttle Pod and the Dynamic Perception Stage Zero. So the focus of this post will be more on using the two systems and using the Epic as a timelapse camera only. Primarily I have been using the Kessler Shuttle Pod system as it was the one I wanted to test out.


 Epic X #126 that I was running on these two rigs was usually built with the side handle powering the camera, which provided more than enough power to setup and get a shot. Epic can remain powered for up to 30 minutes using the Redvolt batteries that RED sells. So using this setup the camera was kept pretty small and light. The only time where it was stripped down a little further was when I was using it with the pan/tilt head being controlled by the Dynamic Perception MX2 controller.


 The Kessler Shuttle Pod equipped with the Oracle controller using the sectional track that Kessler makes provided a super stable platform for the Epic X to sit on. It also gave me the option to shoot on a 12' track or scale it down to a 4' track. Some of the locations didn't give me much room so it was nice to have a track that could be scaled up or down. Not to mention it made getting the track in and around some of these LA locations much easier.


 The Kessler motion control system along with the Dynamic Perception system offer some very good advantages to urban shooters. Each system has its pluses and minuses for shooting in an urban environment. What I found what works for me is to have the systems built up enough to where I can carry them from my vehicle and set them up where I've scouted my shot. I've tried building them at the location I want to shoot at and it can sometimes become cluttered with things you really don't need out there while shooting. Since shooting in an urban environment can be a little dicy for a couple reasons its usually better to have less than more sitting out. So what I'm trying to say is only bring what you need. But after building the Kessler system a couple times now I have kept my trips bringing gear to a location down to 2 and as few as 1 if its with the Cineslider.


 The benefit of a system like the Kessler Shuttler Pod is that the rig can support a decent amount of weight, which is great when shooting with a camera like the RED Epic. The typical weight of the Epic I was using was around 8-12lbs. Plus the interface on the Oracle controller is really easy to understand. Most of the time I was using the "cruse control" feature built into the beta 3 software as I found it much faster to get shots rolling. The other method is using "Smartlapse" which I think is going to make things much easier for me in the future. But for right now I'm sticking with the cruise control function to get my shots. The minuses of the Kessler system was mainly the weight of the track and the shuttle pod its self. But its something to be expected if you want a system to hold a decent amount of weight and be rock solid.

 The Cineslider was something that was recently sent out to me to use for this timelapse piece and it was something that worked great for shooting urban timelapse on the Epic. Its a system that has a really good travel distance of 5' and comes in a case that makes it easy to sling around your shoulder and take it out with you to a location. It does weight a little bit but I find it to be on the same level as bringing the shuttle pod track out but with no shuttle pod. For some of the shots I needed to get in and out of there or parking was a nightmare. So the portability of the Cineslider worked great. I would usually walk out to the location carrying the Cineslider in its case, another soft case with some carbon fiber tripods, backpack with the Epic and everything I needed to get it running and a battery with the Oracle controller hanging from that. Setup with the Cineslider is a little faster but that comes from not having to build the track.


 The Dynamic Perception system is one that I have been using the longest so I'm pretty comfortable with it. I find it to be better suited for shooting timelapse on a 5D2 instead of a Epic camera. But it can be done. What I like about the DP rig is that it is very small and light weight even with two sets of sticks attached to the rig. I've hiked it out to all kinds of locations using a 10' rail that I bought. But that's also the problem, the 10' rail. It would be nice if the rail was collapsable as it would be far easier to transport around. Having a truck or someway you can mount a 10' rail to the roof can be helpful for sure. Of course what's nice about the DP rig using this track system is that it can be bought almost anywhere in the word that sells 80/20 materials. The length of track that Dynamic Perception sells with their kits is 6'.


 The Kessler and Dynamic Perception systems are very different in some ways and of course very similar in what they can deliver. But I would want to say the biggest difference between the two systems is the user interface. That and the build of the systems is what I believe you are paying the difference in. The Dynamic Perception can take some getting use to for shooting timelapse and I've had other shooters get a little irritated using it because of the user interface. But if you familiarize yourself with it then its not so bad and you can navigate the system much better. The Kessler systems offer a much greater amount of control and is robust enough to handle much larger camera systems.

 The downside of the Merlin pan/tilt head that Dynamic Perception currently supports is that with an Epic on it built almost completely stripped down the head is on the edge of not working. As long as you are operating within certain parameters on that pan/tilt head it will work fine. But I found that you can't have it start off looking down past 45 degrees or the weight of the camera with start to move the camera down even further.


 As of right now I'm waiting on the new version of the Revolution head that Kessler is coming out with that is lower profile and perfect for doing timelapse on. I got to see this new pan/tilt head in action up at Timefest over last summer and I was impressed. So hopefully I will see that land soon.

 Just a little bit about shooting timelapse or regular motion footage using the really big Canon lenses on Epic. Make sure you have a good lens support that can be adjusted to make sure there isn't a ton of stress on either of the mounts. I made a lens support using a old hybrid bridge plate rod support attachment from Element Technica. Which is way cheaper than most of the options that are out there. Did it offer all of the support that some of those other $500 lens support systems offer...no. But did it work enough for me and my uses...of course. It worked so well that I have no plans to ever get another lens support. I just might modify the one I have for future big lens use. The super telephoto lens I was using was the Canon 800mm 5.6L and sometimes I was throwing on the Canon 2x TC III to give myself a 1600mm lens.


 Shooting timelapse on Epic as of right now isn't the easiest thing as you are very limited on your exposures, which I'm sure RED will fix in future builds of the firmware for the camera. Shooting timelapse on Epic requires you have two different black shade calibrations saved in the camera. To do this you have your long exposures set under the user setting in the black shade calibration of the camera and then have the factory one setup for regular 24fps shooting. Whats cool is that the camera can be switched back and forth between these two settings without having to re-black shade. For now I think Epic, or Scarlet for that matter, is best suited for urban environments as far as timelapse goes. Once RED gets the shutter speeds longer then Epic might be able to shoot some astro timelapse. Plus having the addition of an interval setting would be nice and save space on the SSD cards.

 So here's the final video shot on Epic X using the Kessler Shuttle Pod and Cineslider. One of the shots is using the Dynamic Perception system. All of the pan/tilt moves were using the MX2 controller and the Merlin telescope head.


 Very big thanks to Eric Kessler for getting everything dialed in and getting the gear to me fast. Also a big thanks to Jay Burlage for all the support with the Dynamic Perception system.